October 25, 2022
Most anything out of the box isn’t as good as it could be with a little bit of tweaking and getting the most out of a KDS is much the same.
Like adding milk to breakfast cereal, taking care to do a few things to the device and with your environment will make the experience better. Here, we’re going to offer a few pointers you can apply to a setup using Clover and SimpleKDS.
3 ways to get the most out of SimpleKDS
One of the nice parts about SimpleKDS is that you have to do very little to enjoy a full-functioning KDS at your location, provided you haven’t done anything too unconventional in your Clover inventory.

After you’re done with this blog, you’ll see a 25% increase in HP for your KDS, easy. | Source: Kelly Eliason on Unsplash
With that said, a little planning before rolling up your sleeves to tackle a few easy tasks will lead to a better experience with your KDS.
1. Use an inexpensive tablet, not a cheap tablet
If you know what I’m getting at, then you can probably skip ahead to the next item. But for everyone else, know that tablets are like anything else: some less expensive tablets are a great value while others might as well be paperweights.

Save for those who like to use paper in windy environments, some devices are completely useless in any capacity. | Source: 五玄土 on Pixabay
SimpleKDS is designed to be able to run securely on Android devices running OS version 4.1 and higher, which is quite old.
Ideally, look for something running one of the more recent versions of Android (at the time of this writing, the most recent version is Android 12) as devices that were built for 4.1 at the time it was released will likely be near the end of their lifespan and not quite as powerful as something more current.
The idea of the best tablet changes too rapidly to make any kind of definitive recommendation so it’s best to vet these devices like anything.
Check for reviews when looking for products in your budget – generally speaking, you should be able to buy something new that will be more than adequate for your needs for between $100 and $200. You can go fancier but there shouldn’t be a need if the device’s sole purpose is for SimpleKDS.
It’s also a good idea to invest in an accident protection add-on when available. Note that not all of these are created equal: for example, some can take a few days to ship off a broken product for a replacement (usually a refurb) so make sure to get all the details upfront and possibly, invest in a spare.
This is helpful too for scenarios like theft or loss which isn’t always covered by accident protection plans.
2. Give your network some love: ensure you have adequate network connection strength
Here is another example that doesn’t concern the app itself, but rather how well the device is connected to the Internet.
Good placement means where there’s a reliable connection and not above an extreme heat source or where there’s glare. | Source: Goumbik on Pixabay
Every structure is different but all will be limited by their size and the distance between devices and their access points.
There are all kinds of secure, inexpensive solutions to extend the Wi-Fi range of your network which is helpful for the many establishments relying on wireless devices.
Because SimpleKDS uses data sent from Clover over the web once a transaction is complete, this also means you could use a mobile network as well (should it make sense).
There are a lot of different solutions available to extend your wireless network coverage easily but physical extensions can be another story, meaning you’ll need to (well, want to) hire a professional for large jobs. Otherwise, you can use tools like the free Wifi Analyzer on Google Play to get an understanding of signal strength in any given area.
3. Configure the SimpleKDS system around specific setups
You can easily have SimpleKDS up and running in just a few minutes if just stick with all the default settings.
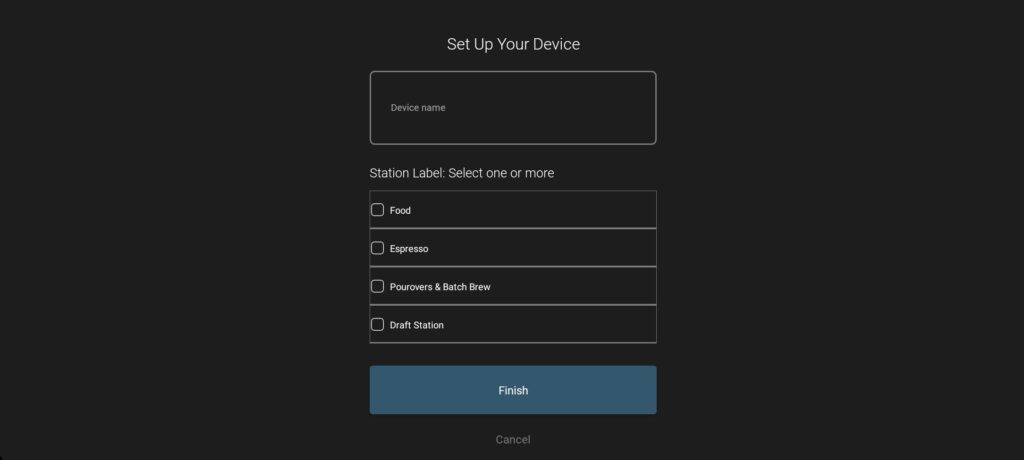
This is purposeful as it allows the many locations that will only need a single KDS to display all orders that come through a store using the default output.
For those looking for more specific display configurations, this can be accomplished in one of two ways. During setup, you can opt for which Clover labels the app will display during setup – this allows you to isolate the output to just the selected labels when these are appropriately configured in Clover.
You can also further customize the output to include custom modifiers, show the order ID, as well as add the order type.
Of course, these settings are all optional as many restaurants will get an optimal experience from simply setting their SimpleKDS app to accept everything Clover blasts out.
Get SimpleKDS for your Clover-powered business
Making a few tweaks to your setup isn’t necessary for everyone but for others, it could make a world of difference. And if you’re not using Clover, you should probably look into tweaking this detail about your business!
For Clover merchants, download and use the app on an Android tablet for free from Google Play!
